In this posting I’ll show how I made not just a Z-Wave packet sniffer but a SUPER Z-Wave packet sniffer that is able to receive many Z-Wave frames that a mere average sniffer cannot.
If you are a Z-Wave developer there is a packet sniffer tool available with the Z-Wave development kit called the “Zniffer” that is similar to the popular WireShark network sniffer. Unfortunately for the average Z-Wave user, the tool is only available to developers which requires the purchase of a DevKit and signing the applicable NDA documents. The Zniffer software is available on the Sigma Technical Support Site (ZTS) which requires an account approved by Sigma so you have to prove you are a developer. The Zniffer is invaluable for developing with Z-Wave because it decodes and can decrypt the encrypted frames traveling over the radio. The Zniffer is able to capture every routing attempt and every acknowledge as well as FLiRS beams and even collisions on the radio. This is way more information than you can get via the SerialAPI and is the only way to diagnose many problems you will encounter while developing a Z-Wave based product.
How to make a Super Zniffer
You can’t buy a Zniffer. 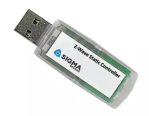 You have to make one out of a UZB which is a simple USB stick that provides a COM port that talks to a PC over USB. The ZTS site explains how to convert a UZB into a Zniffer which isn’t easy to do and every time I do it I seem to have about a 1 in 5 chance that I permanently brick the UZB and have to just throw it away (fortunately they are only $25). Once you have the Zniffer firmware loaded into the UZB, use the Zniffer software and make sure it’s working. The UZB works well however it has a tiny helical antenna which means it is limited in its ability to capture all the traffic over the radio. The key to making a Super Zniffer is to tear out the little helical antenna and replace it with a full 1/4 wave antenna.
Solder on an SMA connector
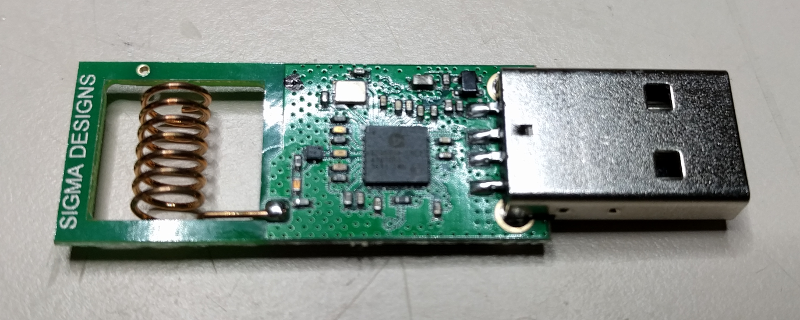 The first step is to pry open the UZB enclosure. Use a small flat head screwdriver to pry it open along the USB connector. There are pins that hold the two halves together. Be careful not to break off the pins as we’ll use the enclosure with the Zuper Zniffer.
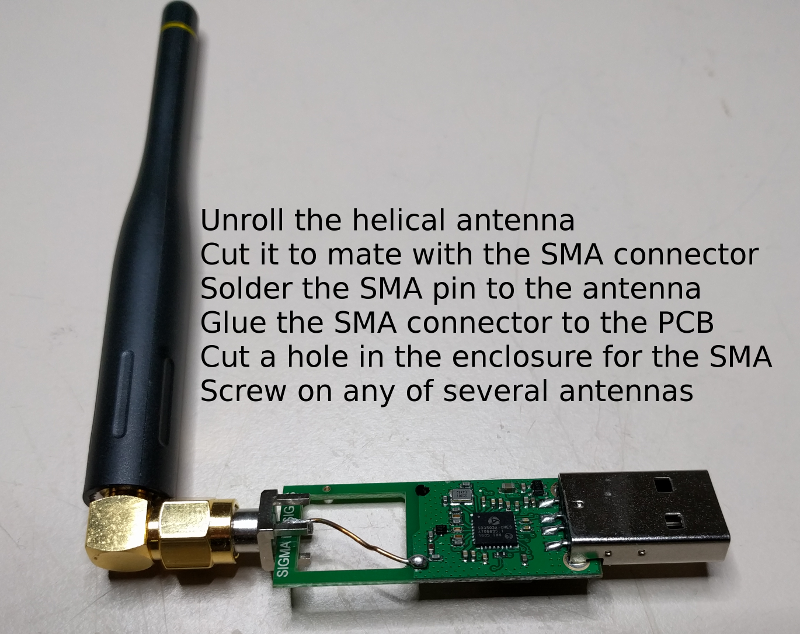 Next unroll the helical antenna and cut it off so it just reaches the end of the PCB. Place the SMA connector on the end of the PCB and solder the antenna wire to the center pin of the SMA as shown above. You can solder the ground pin of the SMA to the PCB ground but it doesn’t seem to make much of a difference. Cut the enclosure to make room for the SMA connector to stick out the end and then snap it back on. Then screw on any SMA antenna and try it out. I typically get 3 to 5 more dB as reported in the Zniffer software RSSI column. This should be nearly 10X more range. There are so many antennas to choose from once you have an SMA connector so experiment and find one that works for you. You can even use a Yagi antenna which would then make the Zniffer highly directional.
Comparing the Zniffer to the Super Zniffer
A regular Zniffer and even the Super Zniffer won’t capture EVERYTHING traveling over the radio waves. That is just the nature of RF. When analyzing the trace in the Zniffer you have to remember that you might be missing frames that your target can see AND that even though you can see a frame it is possible the target didn’t see it. Thus, analyzing the Zniffer trace takes some getting used to.
Here is a typical Zniffer trace:
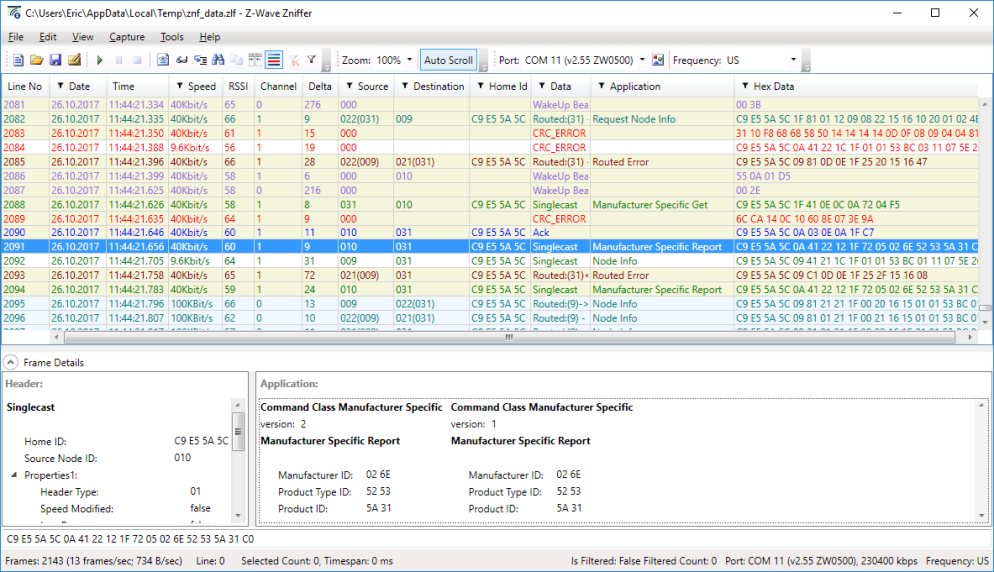
And this is the Super Zniffer trace of the same time when both Zniffers are right next to each other. Compare line 2084 above (the 2nd red CRC ERROR line) and line 2113 below.
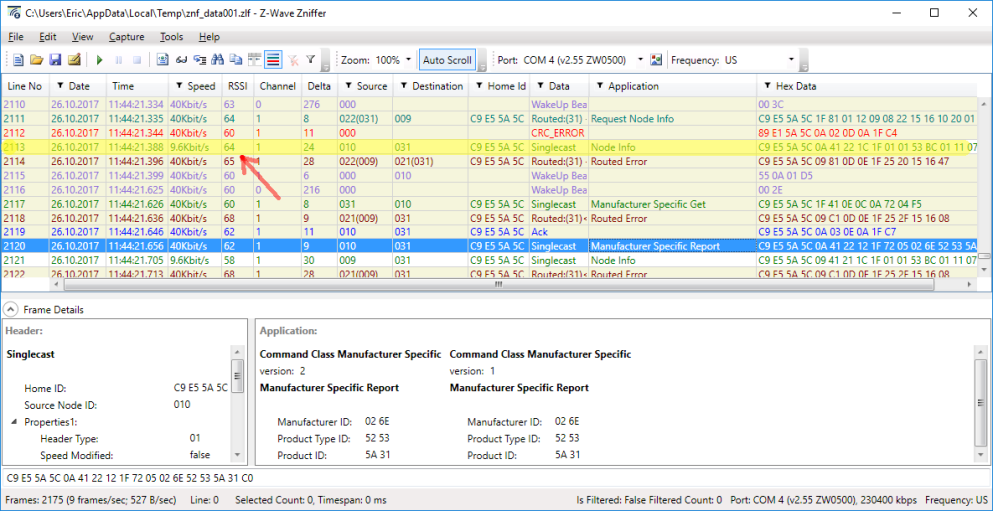
Notice the yellow highlighted line on the Super Zniffer trace. If you compare this line with the one from the normal Zniffer you see the normal Zniffer only recorded this frame as a CRC error and was not able to capture it correctly. Also note that the RSSI is only 56 compared to 64 for the Zniffer indicating the antenna is providing about 8dB more signal strength than the tiny helical antenna of the normal Zniffer. The improved reception of the Super Zniffer makes debugging Z-Wave problems much easier as you aren’t having to sort thru as many questionable frames.
