 IoT Device Testing Best Practices by Eric Ryherd
Click HERE to see the entire presentation including my notes. If you are a Z-Wave Alliance member a video of the presentation is usually posted on the members only section of their web site. The main takeaways from my presentation are:
- Have a written test plan
- Use the Compliance Test Tool (CTT) as the START of your test plan
- Vary the environmental conditions during testing
- Test using real world applications
- Test using complex Z-Wave networks with routing and marginal RF links
- Test with other hubs and devices
- Automate testing using tools like the ZWP500
- Code firmware with failure in mind
- Utilize the WatchDog timer built into the Z-Wave chip
The presentation goes into detail on each of these topics so I won’t duplicate the information here. I also go thru several failures of devices I’ve been working with. You learn more from failures than you do when everything just works. This is the same presentation that gave last fall in the US summit.
Z-Wave Summit Notes
 There were nearly 200 attendees at the Summit – a significant increase over last year. One of the main purposes of the summit is to learn what’s new in Z-Wave and what Silicon Labs is planning for the future. The most important news at this year’s summit is the 700 series which was announced at CES in January. Unfortunately we will have to wait a bit longer to get our hands on the chips due to the purchase of Sigma Designs by Silicon Labs. The 700 series chip has been updated to match the other SiLabs microcontrollers so the silicon has been delayed a bit but they expect to ship parts before the end of 2018. Z-Wave will benefit tremendously from a real CPU instead of the very resource constrained 8051 in the 500 series. The feature I can’t wait for is the hardware debugger. We’ll finally be able to single step our C code and inspect variables and set breakpoints. No more PRINTF! Yeah!
Time for hubs to switch to Z/IP and ZWare
The very clear message of the summit is that Z/IP and ZWare are now mature and is THE gateway interface going forward. My initial brief trials with Z/IP were frustrating with poor documentation and the software really wasn’t quite ready. But with the recent release of 2.81 it would appear it is ready for prime time and I’ll have to give it another look. I was surprised by the number of gateway developers that were at the summit and most were already using at least Z/IP and many also using the ZWare abstraction layer. The SerialAPI is the interface most gateway developers have used in the past but this is a very low-level interface. There are many nuances of handling sleeping devices and the complexities of the encrypted security encapsulation when using such a low-level interface. This is where Z/IP comes in which handles nearly all of these lower level details for you. Z/IP is planned to be the only supported interface in the near future and certification costs will be significantly higher if it is not used. ZWare adds another layer on top of the Z/IP which provides much easier C++ objects relieving the developer from having to learn the details of each Z-Wave command class. See the Z-Wave Public web site for more details.
The internal Z-Wave Technical Site (ZTS) is now also available to everyone but you still have to click on “accept terms” to gain access. However the access is granted immediately so you don’t have to wait for “approval”. So anyone wanting to learn about the inner guts of Z-Wave can now do so without buying a DevKit.
Summit isn’t all work, work, work
 The Summit isn’t all work all day even though the days are long and filled with lots of technical information. This summit had an evening at the Rosarium park. The park has room for team building games like a maze run, archery, volleyball among other games and of course lots of food and drink. It was a nice ice breaker and a good way to get to know your fellow Z-Wave developers. The networking opportunities are a very large part of the value of attending the summit in person. The evening highlight was a performance by the “Interoperables” Z-Wave Rock and Roll band lead by Alliance chairman Mitch Klein.

 the router and then login to it from anywhere in the world. The system is secure and password protected. The HS3 application serves web pages with a status of every Z-Wave device. The HS3 application runs on the Raspberry Pi so all processing is local which means temporary Internet connectivity outages are no problem.
 Features
 Sigma Designs


 Silicon Labs is a well respected semiconductor manufacturer with an array of microcontroller products from 8-bit 8051s thru modern low-power ARM CPUs. Silicon Labs has been chasing the IoT market since before IoT was a “thing”. Their low power micros have industry leading features often integrating the latest connectivity solutions like USB, Zigbee and now Z-Wave. With a market cap of nearly $4B, Silicon Labs (
 In my opinion, the most interesting part of the announcement is that SiLabs is buying Z-Wave and not Sigmas primary business of Set-Top-Box processors. The announcement states: “Sigma Designs is in active discussions with prospective buyers to divest its Media Connectivity business”. The announcement goes on to say that if Sigma can’t unload its “Media Connectivity business” then SiLabs will buy just the Z-Wave portfolio for $240M thus making the rest of Sigma worth only $42M assuming someone is willing to pay that much for it.
 Z-Wave was originally invented by Zensys based in Copenhagen Denmark in 1999. Originally the Z-Wave protocol used Chipcon radios (acquired by TI) and Atmel processors (acquired by Microchip). In 2003 Zensys announced its own custom designed “100 series” Z-Wave transceiver which was a complete Z-Wave capable IoT System-On-Chip. In 2008 Zensys was struggling financially. Fortunately Sigma stepped in an purchased Zensys for an “undisclosed amount”. Nine years later, Sigma has sold Z-Wave for a very nice ROI of perhaps 100X. Mergers and acquisitions in the semiconductor industry are frequent as technology and markets shift in unforeseen ways.
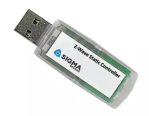 You have to make one out of a
 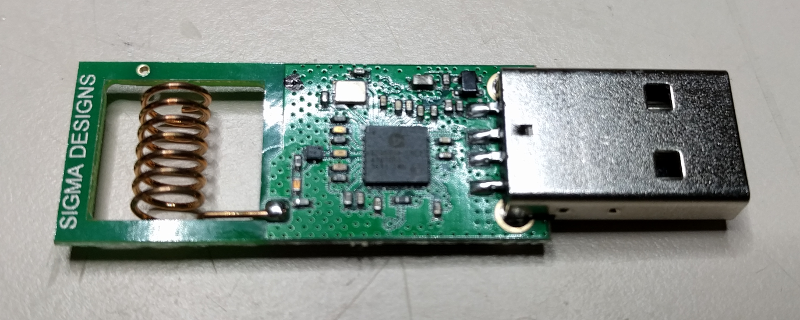 The first step is to pry open the UZB enclosure. Use a small flat head screwdriver to pry it open along the USB connector. There are pins that hold the two halves together. Be careful not to break off the pins as we’ll use the enclosure with the Zuper Zniffer.
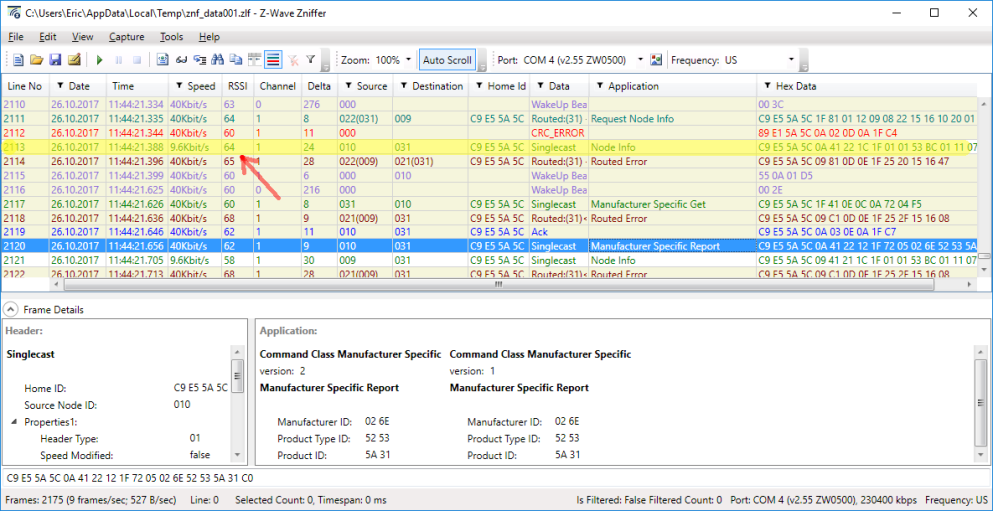
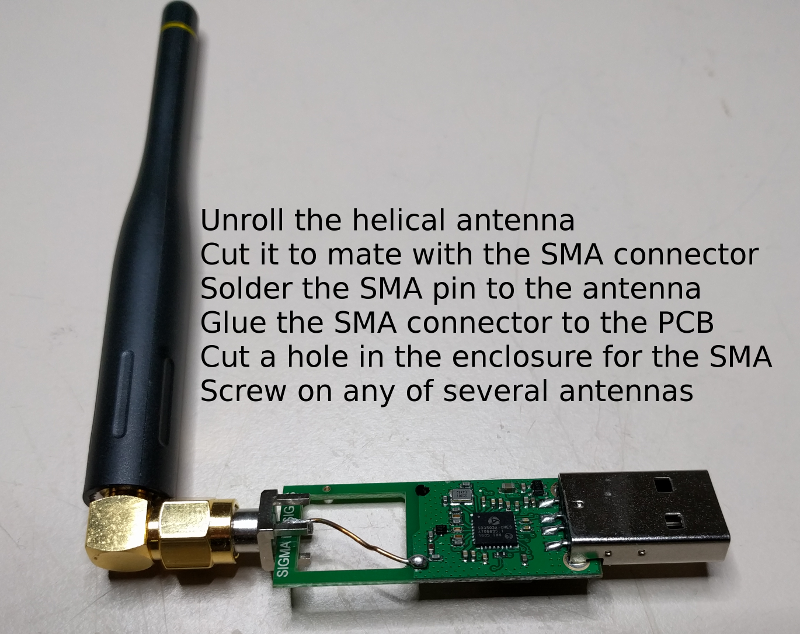 Next unroll the helical antenna and cut it off so it just reaches the end of the PCB. Place the SMA connector on the end of the PCB and solder the antenna wire to the center pin of the SMA as shown above. You can solder the ground pin of the SMA to the PCB ground but it doesn’t seem to make much of a difference. Cut the enclosure to make room for the SMA connector to stick out the end and then snap it back on. Then screw on any SMA antenna and try it out. I typically get 3 to 5 more dB as reported in the Zniffer software RSSI column. This should be nearly 10X more range. There are so many antennas to choose from once you have an SMA connector so experiment and find one that works for you. You can even use a Yagi antenna which would then make the Zniffer highly directional.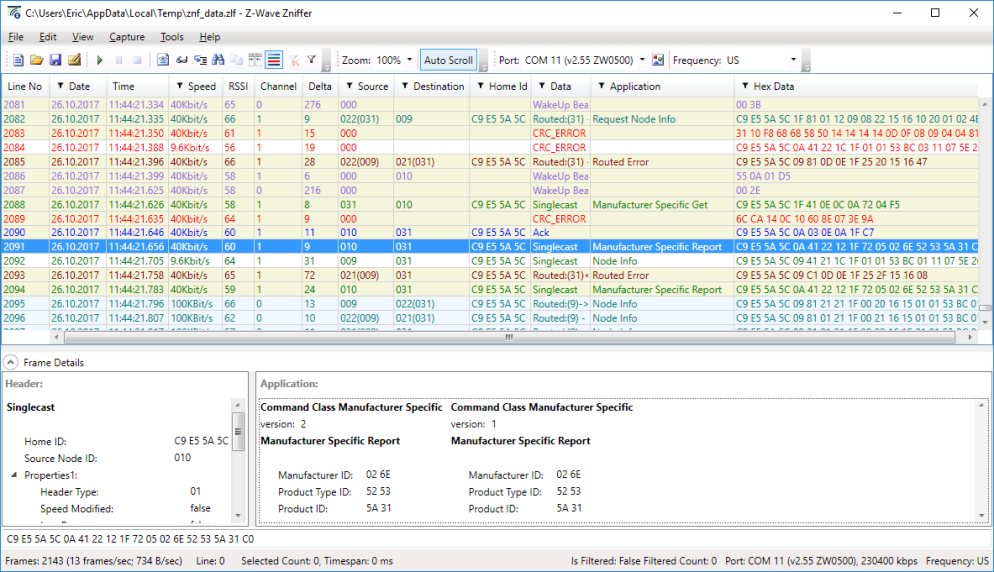
 Click
Click  The presentation goes into detail on each of these topics so I won’t duplicate the information here. I also go thru several failures of devices I’ve been working with. You learn more from failures than you do when everything just works. Feel free to comment and let me know what topic you’d like to see for next years summit.
 The Summit isn’t all work all day though the days are long and tiring. Tuesday evening was a reception at
  SmartThings (a.k.a. ST) relies on the Cloud for processing which makes it flexible but is a little slower executing commands compared to a system with local processing. The ST user interface is exclusively thru a smartphone or tablet, there is no web interface for desktop computer access. The system is easy to use with good support and an active user
 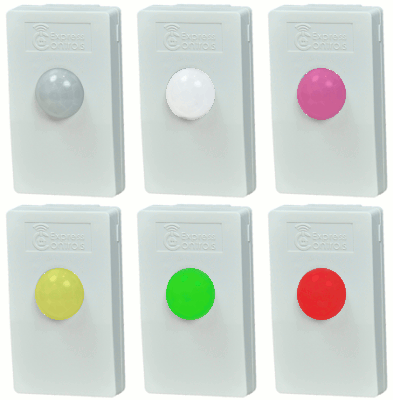 The EZMultipli performs five functions:
 Another placement problem involves pets. If you put the sensor down low in a typical wall outlet, virtually any pet from a cat to a small dog will trigger the motion sensor. You have to either put the sensor up on a higher outlet or in a room that pets are not allowed in when you need to detect if a burglar is in your home. In my case we always close off our home office from the pets during the day when we are not home. Only the EZMultipli in the office and the one in the garage will send us a text when the home is in Away mode.
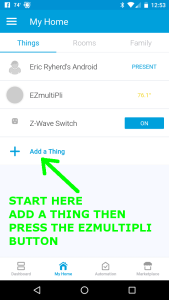
 Include EZMultipli into the ST hub in the normal way: Just click on the
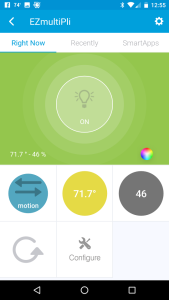
 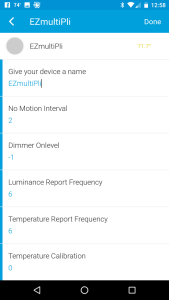 At this point, the best thing to do is to click on the Gear icon in the upper right corner. This brings you to the configuration screen where you can adjust various parameters to suite your needs. Generally the defaults will work fine for most applications. The next section will get into more details.
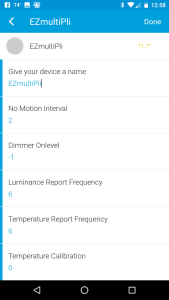 EZMultipli has five configuration parameters that change how the device responds to various events.
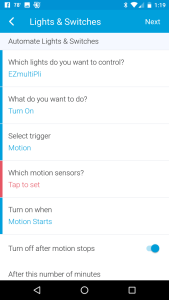 Now that you have a motion sensor, the most common thing is to turn a light on or off when there is motion or not. In ST that is done using a SmartApp. Go back to the home screen and click on Automation at the bottom. Then click on
